Engraver with his own hands: we make a homemade engraving machine
Engraving equipment, with which you can successfully perform various technological operations, today it is actively used as specialists, and home builders. Although to buy such a device in today's market is not a problem, many of those, who would like to have it in the equipment of their workshop, do differently and make an engraver with their own hands.
Homemade engraver with a holder from a dental drill
Despite the simplicity of design, self-made engraving machine allows you to successfully perform such technological operations, as the engraver of the serial model. To such operations, in particular, include:
- milling of flat and shaped surfaces, as well as holes and grooves of various configurations;
- drilling and boring of small diameter holes;
- cutting of sheet material;
- cleaning the product from traces of corrosion and other persistent contaminants;
- application of inscriptions and patterns on the treated surface;
- grinding and polishing.
The self-made engraver with a nozzle from a skin is excellent for grinding of surfaces in hard-to-reach places
Materials, with processing of which the self-made electric engraver is capable to cope, there is a metal, wood, plastic, ceramics, glass, bone, artificial and natural stone.
What you need
Functionality, reliability and technical characteristics, which will have a homemade engraving machine, completely dependent on it, what materials and mechanisms you will use to make it.
Virtually any electric motor can be turned into an engraving machine, adding to it a flexible shaft with a holder
To make simple, but easy to use and functional engraver, you will need the following components.
- Flexible shaft and working nozzle to it, in the clamping mechanism of which the tool will be fixed. As a flexible shaft for the engraver, you can use the drive shaft from the drill or cable, which drives the speedometer of a car or motorcycle. The working nozzle can also be removed from the drill or made yourself from a bar of textolite, turned it to the required diameter and drilled a hole in its inner part. The diameter of the hole in the working nozzle of the engraver must be selected as follows, so that its walls securely hold the fixed part of the drive cable, but at the same time did not interfere with the rotation of its movable core. A tube is inserted into the hole in the front part of such a self-made working nozzle, inside which the cartridge of two halves rotates freely, fastened together with a screw. In the cartridge, which must be balanced, you can install a tool with a shank diameter in the range 2-5 mm
- Set of tools, with which processing will be performed. If you use a drill handle as a working attachment for a homemade engraver, then the tools must be from dental equipment, which fit it in diameter shanks. For self-made working nozzle, as mentioned above, suitable for any tool with a shank diameter of 2 to 5 mm.
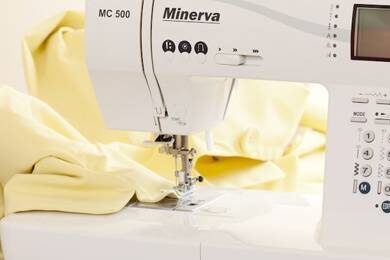
- Drive electric motor, as which you can use any motor, powered by electric voltage 220 volt. It can be a motor from a DVD player or from an old reel-to-reel tape recorder, washing machine or any other household appliances you do not use. The electric motor from the sewing machine is optimum for the self-made engraver, because it already has a rheostat, which allows you to adjust the speed of rotation of the shaft in a fairly wide range. Such engines, usually, able to develop the speed of rotation of the shaft to 6 thousand. rpm, which is quite enough for a household engraver.
Design of a self-made machine for engraving with a flexible shaft
Machine parts
Drawings of engraver details
You will also need an electric drill to make the engraver, grinder and standard set of metalwork tools.
The principle of operation of self-made engraving installation
The self-made engraver of the offered design works on the following principle. Rotation from the electric motor by means of pulleys and a rubber apiary is transferred to a flexible shaft, which, in turn, informs his working nozzle and the tool fixed in it.
The engraving machine with the hands can be made and in other constructive execution, which provides, that the flexible shaft is connected to the electric motor by means of a transition coupling. At one end, such a coupling is mounted on the motor shaft and securely fixed to it with a pin, and in a square hole, performed at its other end, the movable core of a flexible shaft is inserted.
The device of the simplest self-made engraver
Once all the structural elements of the future homemade engraver are prepared, begin its manufacture.
- For reliable and stable fastening of all elements of a design of the engraver it is necessary to make the simplest bed-basis, for which you can use a sheet of textolite or thick plywood, having cut out from it a piece of the necessary size. The electric motor and a bracket with a collar fasten on in advance marked places on a surface of such basis, in which the back tip of a flexible shaft will be fixed. After tightening the mounting nut on the bracket clamp, the end of the flexible shaft must be securely fixed in it.
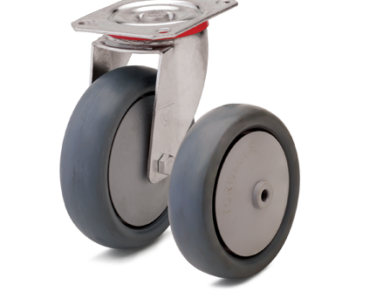
- Pulleys are prepared in advance, which can also be removed from old appliances, fixed on the motor shaft and on the movable core of the flexible shaft. To perform such a fixation, it is necessary to drill holes under the flange of the pulleys and on the shafts, in which pins will then be inserted. Ordinary epoxy resin will help ensure a secure connection. Transmission of rotation from the electric motor of a flexible shaft, carried out with the help of pulleys and passikov, convenient for those, what, changing the diameters of the pulleys used, you can adjust the speed, reported to the grower.
- The final stages of production of the engraver of the offered design are installation of a rubber apiary on pulleys of a flexible shaft and the electric motor., connecting the motor to the power supply, fixing the working nozzle with the tool on the front end of the flexible shaft and testing the finished device.
To make your engraver safer to use, make a compact cover for its electric motor and belt drive (you can use ordinary plywood). Because the hands when working with the device are busy holding the workpiece and the working nozzle, you can equip the engraver with a foot pedal to turn it on and off. The main element of such a pedal, the body of which is also often made of plywood, there is a normal push button.
As a drive for the engraver, you can use a Bulgarian with a "flying" reducer.
Some useful tips
Deciding on that, which flexible shaft to use to equip your homemade engraver, it is better to choose drive elements from dental drills. It is recommended to do this for that reason, that such shafts, even removed from old drills, already equipped with working nozzles with collet-type clamping mechanisms, in which the used tool is very conveniently and reliably fixed.
Meanwhile, the use of a flexible shaft from a dental drill as a drive element of the engraver nozzle has some inconveniences. They are that, that it is not always possible to choose tools for dental attachments, necessary when working on an engraving machine. This problem is solved quite simply: many engraver tools can be made yourself, using the materials at hand.
Homemade nozzles for the engraver
So, high-quality cutters for engraving machines can be made from broken drills, if, using a conventional grinder, provide their working part with the required configuration. Abrasive heads of different shapes, which are actively used in engraving, can be made from fragments of a grinding wheel of medium hardness.
First, such fragments must be equipped with a shank, which is made of steel wire with a diameter 2,6 mm. Then such a shank is inserted into a pre-made hole in the abrasive fragment and monolithic in it with epoxy resin. The last, what remains to be done to turn such a blank into a full-fledged tool for the engraver, - is to give its abrasive part the necessary configuration with a grinder, equipped with a high hardness wheel.