Instructions for installing Webasto with your own hands
The problem of starting a cold engine at low temperatures is well known to every car owner. The power unit is difficult to start in the cold, the degree of wear of the loaded details of the motor during such starts increases. Also in the winter the comfort of operation of vehicles is significantly reduced, as the warm-up time of the internal combustion engine and interior space to an acceptable level can be significantly increased.
To effectively solve these problems, the car can be equipped with a preheater. There are several types of such devices, at the same time liquid heaters of the Webasto type engine possess the best autonomy and productivity.
We also recommend reading the article about it, how to choose an engine preheater. In this article you will learn about types, installation features, as well as the advantages and disadvantages of various devices for heating the engine and cabin before starting the engine.
In this article, we intend to talk about it, how much is Webasto with the installation, what are the features and nuances of installing Webasto on a gasoline engine or diesel unit, as well as how to install Webasto on the car.
Should we install Webasto
so, if the car is operated in a region with frosty and long winters, used in similar conditions as a commercial vehicle, the driver wants to increase the comfort of operation in winter, etc., then the question of installing a preheater becomes especially relevant.
In the case of Webasto, the answer will be yes, even given the relatively high initial cost of such a heater and its installation. In the middle, buy and supply Webasto will cost from 40 to 100 thousand. Rub. for the device itself (depending on the type of vehicle), as well as close 15 thousand. rub. for installation.
However, such a preheater will allow you to start the engine in any frost, the total resource of the internal combustion engine increases. Also note, that the warm-up of the engine and the cabin with an autonomous heater before the trip is significantly reduced, which allows us to talk about fuel economy (especially with regard to petrol cars).
We also recommend reading the article about it, what are the types and types of Webasto preheaters. In this article you will learn about the distinctive features and principles of operation of air and liquid heaters.
On diesel engines, the Webasto installation solves the well-known problem of diesel fuel, which thickens in the cold. It turns out, installation of preheating is more or less profitable from an economic point of view, as fuel consumption is reduced, the engine is subject to less wear, which reduces the cost of its repair.
For maximum savings, many drivers (especially owners of cars and small commercial vehicles) also prefer to install this equipment yourself. In other words, you will need a Webasto kit, installation instructions, necessary tools and place for work (it is desirable to have a garage with a lift or pit).
How to install Webasto with your own hands
Let's start with that, that the installation of Webasto with their own hands involves a range of operations. If you are not confident in your abilities, you do not have enough experience and appropriate tools, then it is better to refuse independent installation and to address for the help to the professional installation center.
Remember, that incorrect installation can lead to flash and various problems in the course of the subsequent operation of the vehicle and the independent heater, as well as the failure of individual elements of the internal combustion engine and / or Webasto.
The Webasto liquid heater is a stand-alone heater, which takes fuel from the car's fuel tank or from a separately installed fuel supply tank to the heater. Then the fuel burns inside the heater, which has its own combustion chamber.
As a result of fuel combustion, heat is generated, which heats the coolant (antifreeze or antifreeze) engine cooling systems. This coolant passes through the heat exchanger of the heater, which is connected to the standard engine cooling system.
Coolant circulation is due to a separate pump, which is built into the heater. The pump causes the coolant to circulate in a small circle, resulting in engine heating, as well as installed on the motor elements of the power supply system of the internal combustion engine. The Webasto autonomous heater represents a ready set of all elements and details, which will be needed for installation. This kit includes:
- heater;
- electronic controller (control unit);
- coolant circulation pump;
- fittings for connection to the fuel system;
- fittings for connection to the cooling system circuits;
- dosing pump for fuel supply;
- separate exhaust heater system;
- separate air intake;
- mounting brackets and fasteners;
- installation instructions and operating instructions;
As mentioned above, Webasto kits may vary, as are intended for installation on various types of engines and vehicles (petrol and diesel cars, minibuses, trucks, special equipment, etc.). Given these features, the kits have performance differences, basic characteristics and equipment.
This must be taken into account when selecting a heater for a specific car. Example, Webasto installation for diesel on gasoline cars may in some cases require additional mounts and adapters, which ultimately greatly complicates installation.
Webasto installation on the petrol engine
Let's start with that, that installation of the Webasto heater on the petrol and diesel unit will demand free access as to the top, and the lower part of the hood space. In parallel, it is necessary to implement good lighting. The installation process itself involves the following steps:
- To begin with, disconnect the terminals from the battery, after the battery is removed from the car;
- Then you need to decide on the location of the heater in the space under the hood. With that in mind, that the heater is preferably installed closer to the cylinder block, the tank bracket is often used during many installations, which contains the windshield washer fluid.
- The washer tank must be installed elsewhere. Installing the heater closer to the BC allows you to increase its efficiency and reduce heat loss when using the heater. Also at installation special attention should be paid to correctness of an arrangement of a heater in relation to the engine and other elements..
- Next you need to remove the fuel tank, then the installation of the fuel intake and its connection. The fuel supply pipe to the pump is attached to the body from the outside.
- Then the fuel pump is mounted. When installing it, be sure to install a vibration absorber gasket.
- After that in the interior of the vehicle you need to set the on timer, which is included in the heater installation kit, then post to it.
- Next you need to attach to the heater pipes for supply and exit of coolant. The exhaust pipe is also connected to the device. The specified pipe is led to the arch of the front wheel. To do this, you will need to drill a separate hole for the output.
- At the end of the preheater should be connected to the fuel supply tube, then the device is fixed in the selected installation location.
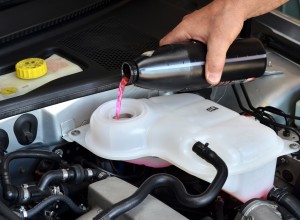
- Now the work is affecting the regular cooling system. The antifreeze or antifreeze must be partially drained from the system into a pre-prepared container, so as not to spill coolant when connected.
- Next, you need to cut the pipeline supply and reception of coolant in the main line of the oven. Tees are used for connection, which are included in the heater installation kit. After that tees are fixed by means of screw clamps.
- After inserting tees and connection, add coolant level to the expansion tank.. Then you need to select the area, where an additional fuse box and relay will be installed, who are responsible for the operation of the regular indoor fan.
- The above relay unit is often placed on the free pins of the motor shield, use the anther of the wing, etc..
- Now it is possible to pass to laying of plaits of conducting, then the installed devices are connected to the car onboard network. In parallel, the exhaust manifold of the heater is fixed to the wing, then the connection to the muffler and resonator is made.
Experts recommend making a small longitudinal cut to simplify the connection between the exhaust pipe and the pipes.. This incision helps to further attract the specified pipe with a clamp, which has great rigidity.
- The final stage can be considered the installation and connection of the battery, after which the first test start of the engine is carried out. After such start it is necessary to start up the engine on XX 5-10 minutes.
- Then check the level of antifreeze and top up the coolant if necessary. Next is a test run of the heater and check all the functionality of the device.
Finally, let's add, that in some cases the heater may not work during the first start-up, as there is not enough fuel in the fuel line. In order for the fuel to fill the highway, it will take some time. After reconnection, the stand-alone preheater must start operating normally.
How to put Webasto on a diesel engine
The installation set of the independent heater for the diesel practically differs practically from analog for the petrol internal combustion engine. As for installing Webasto on a diesel engine with your own hands, most operations are identical to the installation process on a gasoline engine. However, certain features and nuances should also be taken into account.
- First of all, it is necessary to implement the placement of pipelines from the heater to the ovens of the oven in this way, to keep them as close as possible to the fuel lines of the diesel fuel system. This approach allows you to heat diesel fuel more efficiently, which is especially relevant for motors of this type in the winter. The result is an easy and safe start of the diesel in the cold after preheating.
- As for the supply of fuel to the heater, a low-pressure line is suitable for fuel collection. It is necessary to cut a tee in the specified highway. It is also especially important to follow the recommendations when installing the dosing pump, so that the distance from the pump to the tank is not more 1.2 meters. This requirement must be met, as a violation can lead to unsatisfactory operation or various failures in the operation of the heater.
We will add, that in the instructions and technical manual of the manufacturer Webasto describes in detail all the requirements and recommendations for the installation of individual elements in the installation kit of the stand-alone preheater. It is recommended to follow all instructions exactly, specified in the instructions.
Equipping the heater with additional control: installation of a GSM module for Webasto, timer, remote controller
Webasto's basic equipment includes a set with a timer. It is worth knowing, that on many cars, which are equipped with a heater from the factory, the device is used as an engine heater and does not have a regular timer. In this case, you can fully use the heater and control it by installing a timer on Webasto.
- The timer is installed in the car and allows you to program pre-warm-up until then, when you plan to start the engine and travel (example, for 30 min. Before, as the driver will sit in the cabin and start the engine).
In the end it turns out, that autonomous heating on the timer allows to raise temperature of coolant before start, the cabin will also be pre-heated. Let's add, what you need to know to interact effectively with the timer, how to set time on webasto. This can be done, having studied the functionality and operating instructions of the autonomous heater.
- Another solution to control the heater is the ability to install a remote control on Webasto. The main advantages are the compactness of the remote control, as well as the function of turning the heater on and off remotely. In parallel, you can set the duration of the stand-alone heater. Different remotes allow you to control the heater from a distance 200-300 meters to 1 kilometers, may have a feedback light with the heater, etc..
Disadvantages include limited range, as well as possible signal loss in severe frosts. Quite often in practice, the operation of the remote control is limited to the area of direct visibility of the car. In other words, in severe frosts and the presence of obstacles in some cases it is not possible to start autonomous heating. Note, that the Webasto GSM control module lacks such shortcomings.
- Webasto's special GSM control module allows you to organize remote control of a stand-alone heater via the W-BUS digital protocol or via an analog signal via a smartphone or mobile phone. This module works as follows, that the product is installed sim-card of the corresponding mobile operator and stored phone number, from which the module will be further controlled.
The task of the module after receiving the command is to activate the heater. The control command should be understood as receiving a voice call or a text SMS message from the phone, whose number is stored in the module memory. Let's add, that the Webasto GSM module can be a standard factory solution called Thermo Call, and the installation of third-party modules is allowed (example, модуль GSM ALTOX WBUS-4, GSM module Starline M20, etc.).
Additional control of GSM modules can also be implemented through a special mobile application Thermo Call. Properly selected standard or regular module allows you to run all Webasto heaters and stand-alone heaters, which are supported by the original Webasto Thermo Test program.
Similar records

 Auto
Auto