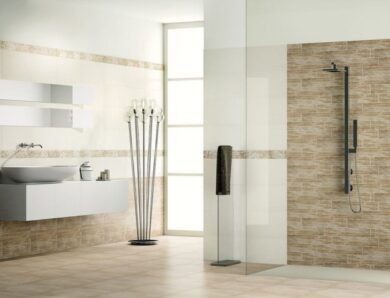
How to glue tiles in the bathroom: laying tiles on the wall
To properly glue the tiles in the bathroom to the wall, you don't have to be a professional builder-repairman. Despite the supposed complexity, laying is quite simple, if you follow the basic rules and procedures.
Carefully read the nuances of facing vertical surfaces
Tools
Before you start laying wall tiles in the bathroom, first of all, make sure you have everything you need. It is not necessary to spend huge sums on expensive professional equipment. Many tools are replaced by others or, in general, improvised means are used.
To properly lay the tiles on the walls in the bathroom, you will need:
- Straight spatula. They put the solution on the facing surface.
- Notched. With its help the glue is leveled, forming smooth grooves.
- Rubber. It will be required at the stage of mashing the seams.
- Bulgarian. Universal tool, which can remove the old coating, remove the hardened solution, saw tiles. Perfectly replaces tile cutter.
- Chisel. Suitable for removing old tiles.
- Set of brushes and rollers. Used in priming and surface treatment, before laying the tiles.
- Level and high. Behind it adjust a laying vertically and horizontally.
- Hammer. With its help the chisel is driven under a tile. A wooden handle will replace a rubber mallet.
This is the minimum set, but other tools are used.
The list for laying is necessary
materials
Now let's consider, than glue the tiles in the bathroom on the wall. To fix the tile, you will need special mixtures and materials for leveling the surface and its subsequent facing.
First of all you need:
- Adhesive solution. You can mix it yourself from cement and sand or buy a ready-mix.
- Primer. Provides better adhesion of materials and increases the protection of the wall from the penetration of excess moisture into its structure.
- Putty. It is desirable to lay the tile on a perfectly level wall. Starting putty is used to eliminate serious differences. In most cases, do without finishing and immediately glue the tile.
- Crosses. To fix the distance between the elements of the masonry using plastic products of the desired size.
- Grouting seams. Fills the gaps at the joints, masks small defects and creates a complete aesthetic appearance of the surface.
- Silicone sealant. In the bathroom it is especially important to provide reliable insulation at the joints to protect against moisture and dirt. With the help of sealant glue the curbs and baseboards.
- Antiseptic. Liquid, which is used to treat walls and seams to prevent the development of the fungus, mold and pathogenic microbes.
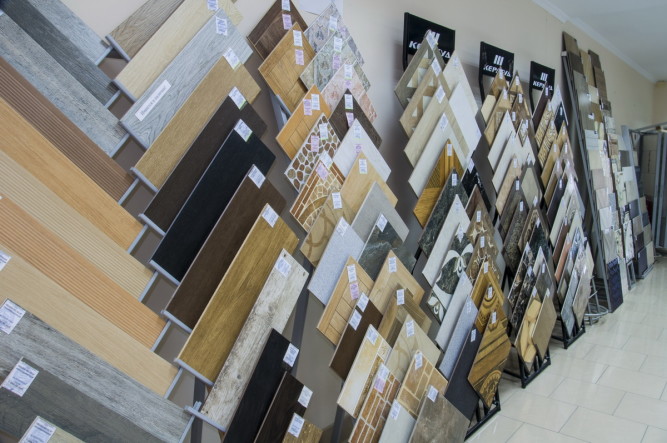
Today on the market construction mixtures are presented in a huge range
pay attention: there are special adhesive mixtures for each type of surface. They differ in the presence of specific additives. If you do not know which solution to choose, stop at the universal.
Preparatory work
Before you start gluing tiles in the bathroom to the wall, a number of mandatory surface and material preparation works are required. In the first place, free the bathroom walls from furniture, fittings and proceed to remove the old tile. Keep this in mind, that together with it remove all layer of a solution. Protect yourself from dust and splinters, using a respirator and goggles.
It is absolutely impossible to lay a tile on such a surface - it is necessary to carry out preparatory measures
The next step is antiseptic treatment of the base. If necessary, waterproofing is performed. If constant contact of a wall with moisture is provided, it is best to coat the concrete with paint.
Then level the surface. In most cases it is enough to mark with the help of level and slope the most problematic places and to eliminate defects with putty.. If the differences are significant, and also if necessary alignment of corners, masking communications, plumbing parts, use a simpler way - drywall, however, take into account, that such a structure is attached to the profile, so, will inevitably take away valuable inches of space. In some cases, you can glue it directly to the concrete.
The last stage of the preparatory process is the priming of the base and the application of auxiliary markings.
layout diagram
To determine, how to properly lay tiles on the walls in the bathroom, it is necessary to think over the scheme of a tile apportionment in advance. It is best to draw it on paper or with a computer program. Having visually assessed the appearance and design of the proposed options, choose the best.
basic layouts
In the bathroom cladding is mainly performed according to the following schemes:
- Straight - the tiles are the same, the seams match.
- Running - reminiscent of brickwork, when each subsequent row is glued with an offset on the half-element.
- Diagonal - used, to visually expand the space. This method is one of the most difficult to perform.
Laying of additional decorative elements is also applied. In most cases, these are tiles with inserts in the form of a pattern or three-dimensional detail or frieze. The latter is a decorative border, which divides the wall into two parts. The upper is preferably made in a light range, and the lower - in the dark.
Making the marking and calculating the number of required tiles, consider the size of the seams.
facing
Laying ceramics on the walls in the bathroom begins with the preparation of the solution and the tile itself. 3-4 soak the tiles in water, and dilute the glue and leave to infuse for minutes 10-15. Then wipe the tile dry and get to work.
How to properly lay ceramic tiles on the walls in the bathroom:
- Secure the support bar or metal profile at the level of the second row. Keep in mind, that all the upper tiers must consist of whole elements, except for the side segments.
- Apply a small amount of glue on the wall or tile and smooth it with a notched trowel. Start gluing the tile from the most visible side.
- Attach the tile to the wall and press.
- Adjust its position with the level, crosses and kiyanki.
- Laying is carried out row by row, but don't put more 3-4, otherwise they will float under heavy load.
- The latter are glued threaded fragments.
Further work is performed in a day, when the solution clings to the base and facing material.
Equipped niches in the bathroom
Processing of seams and joints
Once you have successfully pasted the tiles on the wall in the bathroom, it is necessary to take care of seams and joints. Plastic crosses are extracted from them, and then treated with antiseptic. To apply mastic, dilute a small amount of grout and use a rubber spatula to close all seams. For complete isolation from moisture, it is recommended to use compositions based on epoxy resins.
For sealing corners, floor and wall joints, plumbers and furniture use silicone. It is recommended to use a white composition. If it creates contrast, then take it as a transparent analogue. Additionally, glue the decorative plinth. This completes the work and you can start cleaning.
If the laying of tiles on the walls in the bathroom was done correctly, in a few days you can enjoy the new interior and arrange furniture and accessories.