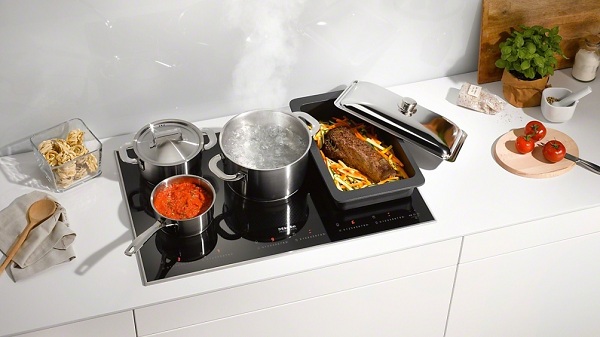
How to properly connect an induction hob to the mains
Obsolete or non-working stoves are eventually replaced by modern models with advanced functionality. Installation of a free-standing device is not difficult - just plug in the included plug. The difficulty arises when choosing a built-in surface. Connecting a user to an induction hob requires basic skills and knowledge. In the review we will study step by step, how to properly connect the device, and basic power requirements.
Tips for choosing a place
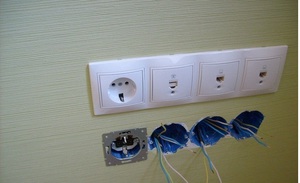
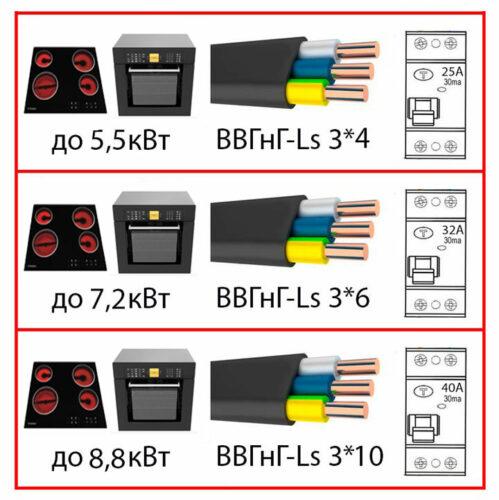
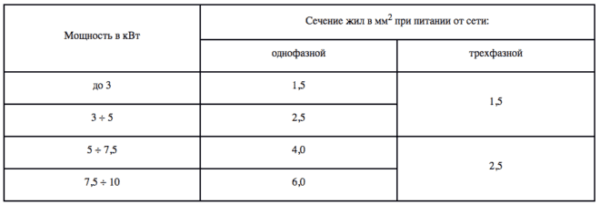
To begin, prepare the place, where induction cooking appliances will be connected - it is better to prepare the socket in advance. For safety reasons, choose an earthing device. For the socket it is necessary to lay a separate branch from a board, and connect to the ELV circuit breaker. Copper wire with a cable core cross section of at least is laid to it 4 mm?. Depending on the type of socket, the cable is selected three - or four-core.
When choosing a location, consider the following points:
- install the appliance without skew, on a flat surface;
- it is not recommended to place the appliance above the dishwasher;
- provide a place for ventilation - the hob should not overheat;
- provide a small gap between the vertical contact surfaces and the rear wall of the device;
- it is recommended to place the appliance above the oven.
Necessary equipment and tools
To connect the electrical panel, prepare the following equipment:
- screwdriver, than;
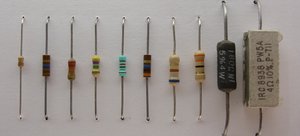
- connecting cable, designed for surface power (4-6 sq. mm);
- adapter clamp;
- tester to check the compliance of the phase of the connection of the colors of the wire.
Included in the kit, usually, cable, consisting of four main wires, denoting:
- phase (black and brown),
- zero (blue color),
- land (yellow-green color).
pay attention! The device is connected via a separate RCD circuit breaker, to which other household appliances are connected.
Number of phases
Installation of all new models of European production is calculated on connection of equipment to a network with various quantity of phases. There are two standards in our homes: three-phase network 380 In and single-phase network with 220 V. The choice of the necessary connection scheme depends on the wiring in the house.
The standard scheme of a cooking surface is presented by terminal group, consisting of five names, marked for convenience by numbers, and one ground, which is indicated by a mark:
The following symbols are used in electricity:
- phases are denoted as L1, L2, L3;
- zeros - N1 and N2;
- earthing with PE marking.
Having dealt with wiring diagrams and wires, you need to study the instructions. The manufacturer's recommendations list all the connections and detail the basic installation steps. After the selected scheme we pass to practice.
Connection of the unit to a single-phase network
This type of connection is used then, when the wall leaves the wire, consisting of three veins. Follow these steps to install the panel.
- Unscrew the metal plate on the back of the panel with a screwdriver.
- With the help of jumpers (they come complete with the device) connect terminals numbered "1", «2», "3" and connect the phase wire (brown, black or white).
- To zeros (contacts under numbers "4", «5») connect the blue wire.
- Connect the yellow-green wire to the protective terminal.
- Replace the device and tighten the screws securing the connecting cable.
- Check the strength and tightness of the connection, as well as the efficiency of kitchen panels.
Before installation of cooking appliances of any brands (panels Aeg, Bosch, Siemens, Electrolux, Hansa, Samsung and others), on the cables of which there is a plug, the contacts and power cords inside the outlet are first checked for compliance. In some devices they differ - in this case we disassemble the socket. Determine the compliance of the connection with a special multimeter. Wires can be swapped if necessary.
Connecting the device to a three-phase network 380 V
A five-core cable is used to install the device, in which there are such parameters: 3 phases, protective earthing and "zero".
The induction hob should be installed in the following sequence:
- Connect the 1st phase wire to terminal number 1 (black, white or brown), under the second number - the next, to "3" terminal - remained.
- Terminals numbered "4" and "5" are connected by a jumper, and to them - the zero wire (usually, blue color).
- Connect the yellow-green wire to the "earth" terminal marked pe.
pay attention! The order of connection of the phase to the contacts of the device is not so important, that is, there is no difference, what color wire the user will connect first.
How to connect the plug to the cable
If the plug has four contacts, then when connecting them must be connected to the marked colored cores of the cable. However, there is another option. In that case, if the socket is three-pin, there is a problem - four cores in the presence of 3 contacts. The way out is simple - black and brown wires from the phase are twisted together and connected to the contact "Phase".
Summing up, I want to note, that the installation of the hob is connected to electricity, therefore, certain skills are required during installation. The safety of people depends on a proper connection. If there is the slightest doubt, it is better to entrust the connection of equipment to professional craftsmen.