How to properly connect a satellite dish to a TV without a receiver and with its help
One of the advantages of satellite TV is the low cost of connection. As can be seen from practice, to connect a satellite dish to the TV, will have to pay close 160$. Other benefits include the lack of a subscription fee (unlike cable TV), quality image and sound, a large number of TV channels for every taste. So, if satellite equipment will have 3 converter (heads), then you can configure from 25 to 40 free Russian-language channels (depends on the satellites, chosen by you).
The principle of operation of the antenna
A satellite dish is essentially a mirror, displaying a signal from the satellite. The reflected signal enters the converter, and the last one sends data to the receiver. It is from him, TV set via TV cable, and receives the converted signal.
By standard, satellites are often chosen: Sirius 5.0 E, Amos 4.0 W, Hotbird 13.0 E, as these satellites can provide a wide range of broadcasts, which satisfy any wishes. But, because technical progress does not stand still, other satellites appear, which provide a large selection of TV broadcasts. And you have the right to choose that one, which best suits your requirements.
How to connect a TV to a satellite dish
To connect the TV to a satellite dish there is 2 ways:
- the cable connects directly to the TV;
- the connection is through the receiver.
Direct connection to the TV
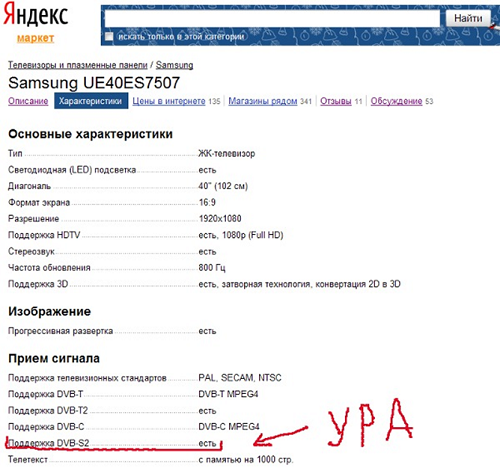
As you know, to watch satellite TV, need a receiver. But modern TVs have begun to install DVB-S2 digital tuners, which make it possible not to use an external receiver, connect the cable to the TV directly from the "plate", and catch satellite TV.
To find out, whether the TV supports this function, you can look at the description of the device, which can be found on various sites, selling consumer electronics.
But, Unfortunately, the TV will catch only free (not coded) foreign channels. For, to watch domestic TV via satellite, you will need to purchase a CAM module, which connects to DVB-S2 via PCMCIA interface.
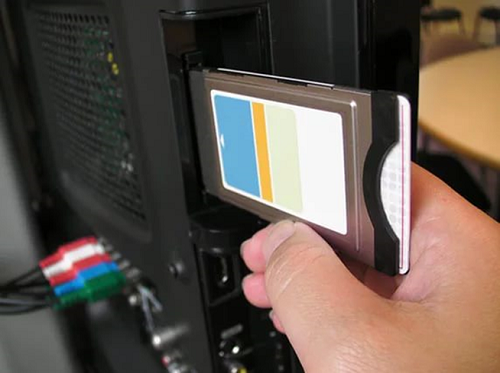
The CAM module is purchased together with the appropriate satellite TV package, which you can choose from many operators, offering this service. The convenience of using such a connection is obvious:
- no need to buy a separate receiver;
- only one remote control will be required to switch channels.
First, than to buy a package of satellite TV CAM-module, ask your ISP, their modules are compatible with a specific TV model.
Plate installation
Before, how to start connecting the cable to the TV without a receiver, you need to assemble the entire set of satellite equipment you purchased, and position the antenna correctly. The place to install the plate should be as follows, to provide good satellite guidance. By the way, the wrong choice of location is a common cause, that the TV does not catch the signal. in addition, the antenna needs access for configuration. So, it must be within easy reach. Various obstacles, such as buildings, trees and various structures on the signal reception path, greatly degrade the quality of television broadcasting.
Mainly, broadcast satellite TV, concentrated in the direction from southeast to southwest. Satellites, located in the south, have the highest elevation above the horizon.
Cable preparation
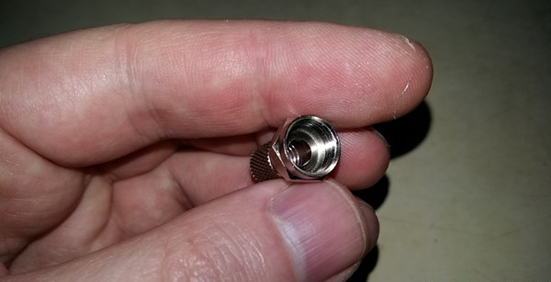
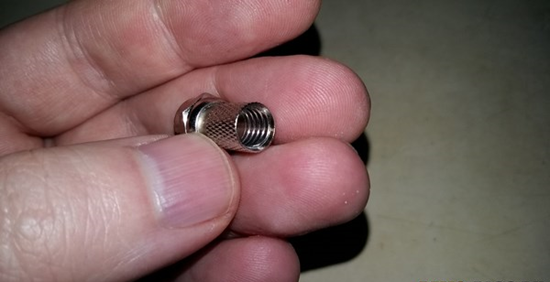
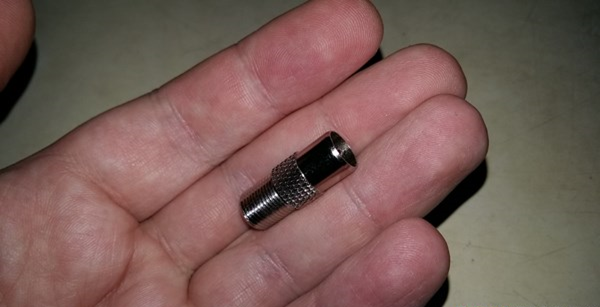
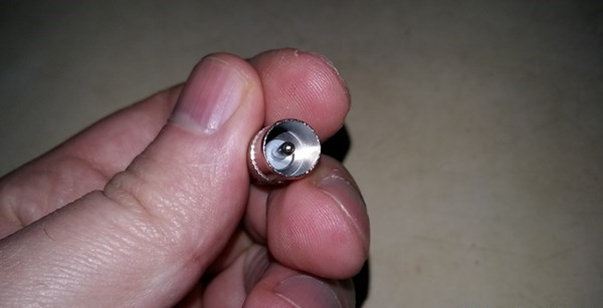
When the plate assembly is complete, you need to prepare the F-connector and cable to connect the antenna to the TV. The F-connector is a simple sleeve, which is fixed to the cable by winding, so it is important, so that it has a thread.
If the output of the TV or receiver is adapted to the F-connector, then it will be easy to connect the TV to the satellite dish. In the case of, when your TV has a normal antenna output, need to buy an adapter.
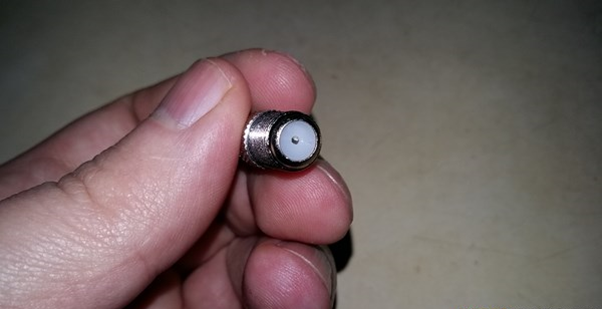
It is possible, Of course, buy and ordinary antenna plug, but they are often of poor quality. In the case of F-ki with adapter, the universal plug turns out, which can be connected as an F-output, and to the antenna.
Before, how to connect a cable to a tv, do the following.
- Remove the top insulation layer from the cable. You will see the primary screen, consisting of intertwined thin wire, which needs to be bent.
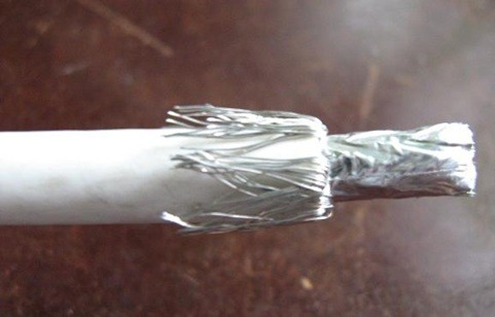
- Under the primary screen you can see the second - made of foil. The foil screen is cut off, as shown in the figure below.
- After this, remove the insulation, to get to the center (copper) lived.
- Before, how to connect the F-connector (antenna plug), the core must be cleaned with a knife from the enamel applied to it, then the cable is wound F-ka. Now, it can be connected to a receiver, or, winding the adapter - to the antenna output. The other end of the cable is connected to the converter, located on the antenna.
Connection and settings
To prepare for watching TV, you need to do the following:
- The plug must be connected to a TV socket called "LNB Satellite IN" (the setting is made on the example of an LG TV).
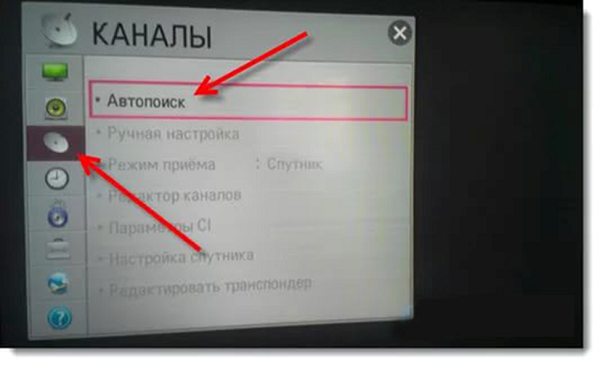
- Now, after connecting the antenna to the TV, you can turn on the device, go to settings and select automatic channel search.
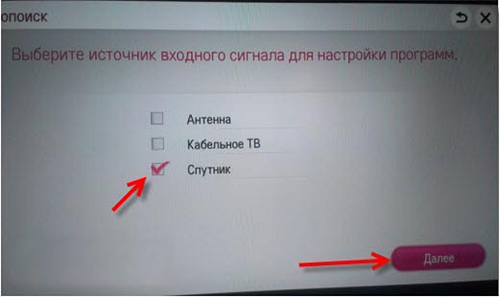
- Upon request, where to look for broadcasts, you need to select "Satellite" and click "Next".
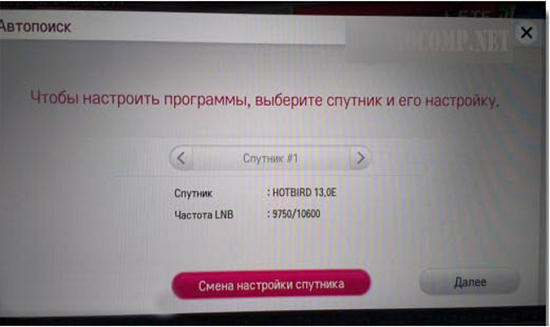
- At this stage, it is possible to select the desired satellite, for its further scanning. Other options are also available on this page, relating to this satellite. After his choice, press "Next".
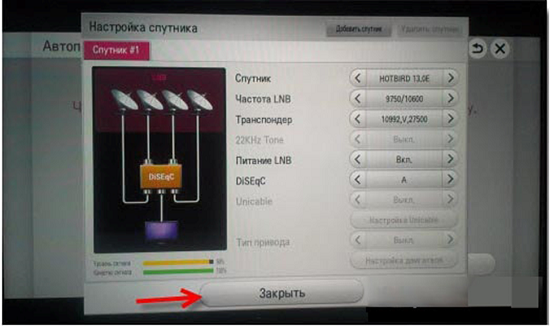
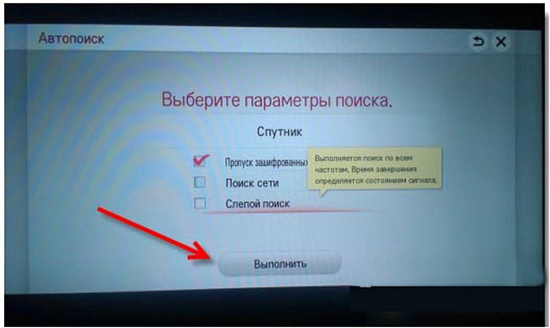
- When selecting additional settings, a window with different settings will appear, where values are displayed, relating to signal quality, as well as its level. The image below is noticeable, that the signal level is at the maximum value. To add a new satellite, there is a corresponding button, located at the top of the window. After closing this menu and click "Next", you must specify search conditions.
- If you do not have a CAM module, and you want to find free broadcasts, then check the box next to "Skip encrypted channels". After installing the necessary data, click "Run".
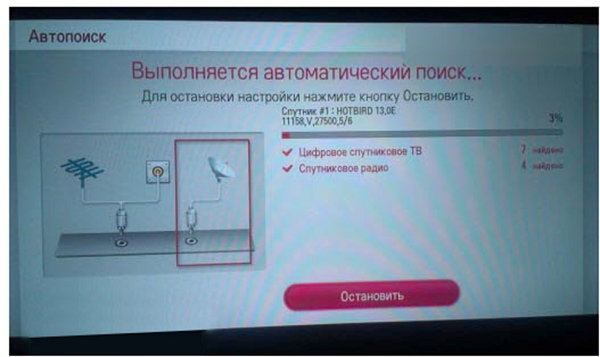
- Then the search for broadcasts will begin. You can watch the number of TV and radio channels during the search, which were detected. If you stop the search prematurely, then channels, found earlier, will still remain.
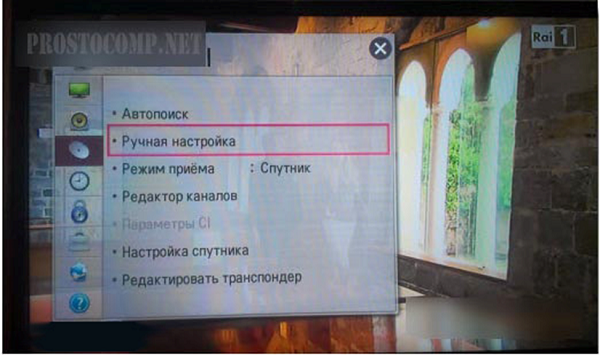
- After, how the scan will be completed, you can start watching satellite TV. If you go to the TV settings in the "Channels" section, then you can see many more options. Example, you can sort channels, edit transponder, set up the satellite and more.
To switch between different TV signal sources, whether satellite TV or cable, HDMI signal or other, the INPUT button is pressed on the remote control and the required one is selected.
Connection via receiver
After, how satellite TV came into being, the receiver has become an indispensable device, which is connected between the TV and the satellite dish. The receiver acts as a decoder, receiving a signal in one format, turns it on, and transmitting the decoded TV signal via a TV cable connection. Read more about choosing this device in the article Digital set-top box for TV.
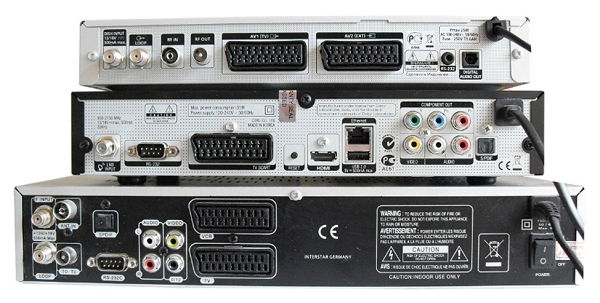
How to properly connect a satellite dish to the device? In modern TVs, you can connect the cable to the TV through the receiver through the following connectors.
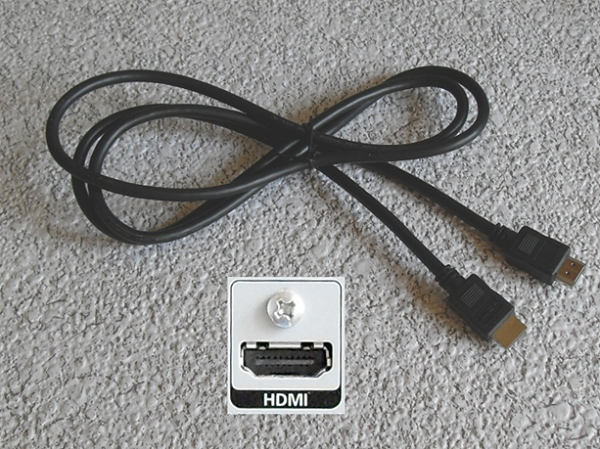
- Hdmi connector. Connecting to this input gives a high resolution image, and it is the most modern and high-quality type of connection. HDMI does not require digital to analog transcoding. This way you can connect the tuner to the laptop, to use the latter as a TV.
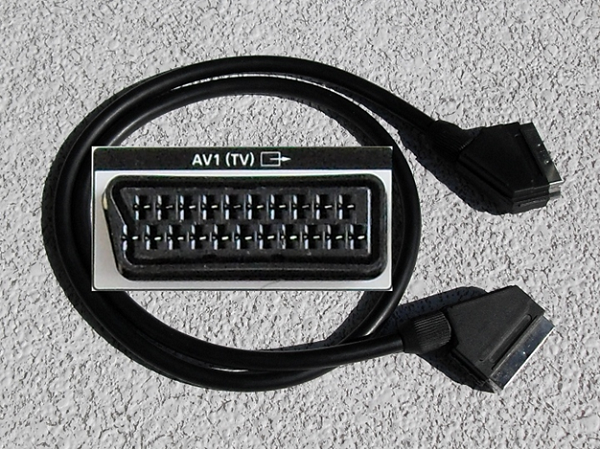
- SCART connector. It is popularly called the "Comb" and is an audio and video connector of European standard. Provides good image quality, not worse, than through the component cable.
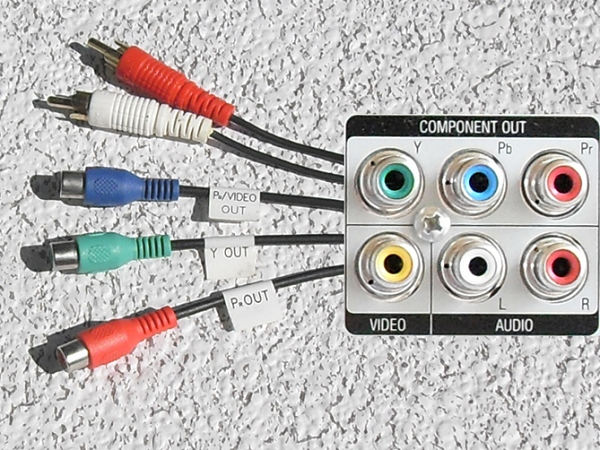
- Component connector (Y Pb Pr). It is the highest quality connection with a special component cable, which can be used to transmit a high resolution signal (1080i), and to connect the TV antenna through the receiver. It is called a component cable, that the transmission of the components of the video signal occurs through several channels. This connector can be used for HDTV transmission.
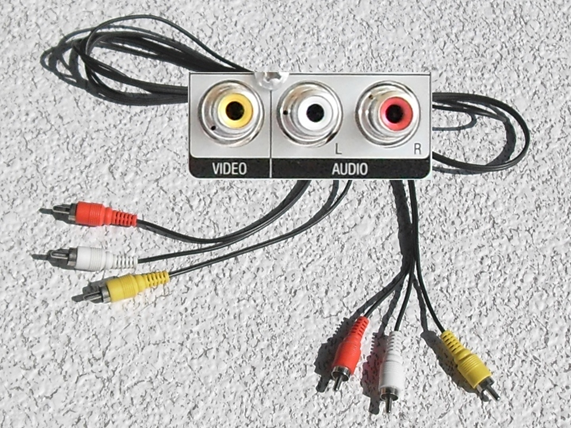
- RCA interface, better known, as "Tulips". The main advantages of this interface are simplicity and accessibility of connection, and then, how to connect the TV to the receiver - can not be difficult. Just insert plugs of a certain color into the socket of the same color. It can be called one of the oldest ways to connect peripherals to a TV, and it is present in almost all TVs. Combined in this way, the unit produces a picture, not of high quality, but quite acceptable for TVs with a small diagonal.
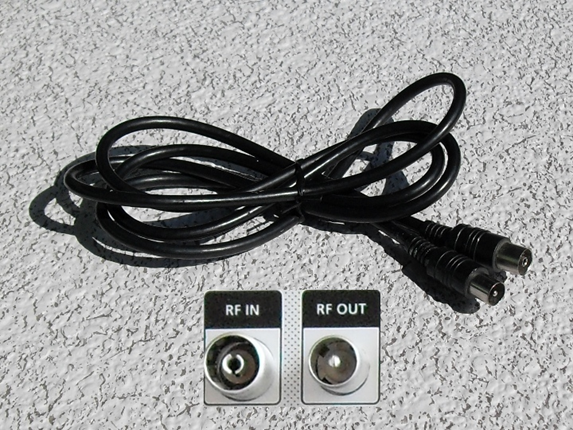
- Ordinary antenna plug. This connection is also called an RF connection and is familiar to everyone, who connected the indoor antenna. The signal quality of such a connection wants to be better.
So, Connecting satellite equipment to a TV is easy. The main thing is to choose the right direction of the antenna, connect the equipment with cables and set up TV reception. Satellite receiver settings, on the contrary - a complex process, which requires some knowledge to perform calculations, necessary for the correct orientation of the mirror plate on the groups of satellites. Then the reception is set up (to do this, you need to know the necessary parameters for input). You can learn about the settings of the receiver with your own hands, watching this video.