Otmostka from paving slabs with their own hands: step by step instructions
Most houses, built in compliance with all requirements, are equipped with a otmostkoy from paving slabs. Consider in more detail, what are the functions of such a design, what are the benefits and how to make it with your own hands.
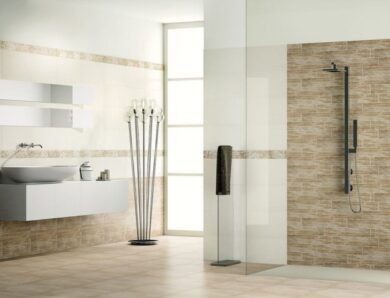
Different materials are used
advantages
By the rules, paving around the house is a mandatory element and performs the following functions:
- protection of the foundation from moisture penetration and destruction;
- creating an aesthetic appearance of the site as a whole;
- providing a convenient passage around the building;
- maintaining cleanliness, especially during the rainy season (no dirt);
- drainage of water to the required distance due to the installation of a drainage system.
Paving of the house from various materials becomes. Example, under the formwork pour concrete along the walls, creating a slight elevation above ground level. Asphalt concrete is also used. As an alternative to solid coatings, bricks are used.
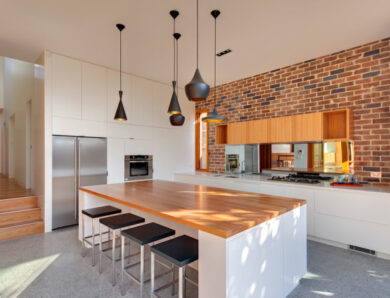
The variety of products allows you to choose the right option for any exterior
Paving tiles around the building has the following advantages over other materials:
- Decorativeness. Its appearance is superior to any analogues.
- Durability. It is resistant to environmental influences, including frosts, and mechanical damage, therefore, service life is measured in decades.
- Ease of care. Does not accumulate water and dirt, does not require specific maintenance.
- Possibility of dismantling. If necessary, the paving is partially or completely removed, make adjustments to the design, replace damaged fragments, etc.. D.
- Environmental friendliness. Even when heated, it does not emit toxic substances, as, example, asphalt pavement.
- Organicity. If paving slabs are used in the construction of paths on the site, such paving around the building will blend organically with them and create the integrity of the exterior.
- Ease of installation. It is quite easy to make it with your own hands, not even having the skills.
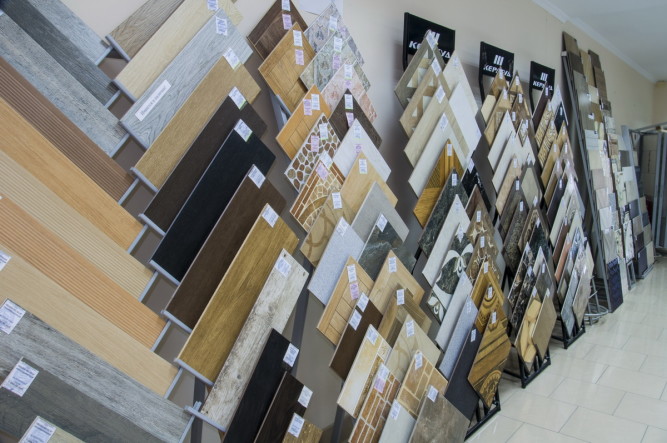
Thanks to the wide range of products it is possible to pick up material of any color, shapes and textures to create unique patterns.
mounting technology
Paving around a private house from paving slabs can be done in several ways. There are three basic technologies of laying:
- on a sand pillow;
- on a cement-sandy substrate;
- on the solution.
Options for paving
Let's look at these technologies in more detail. The first method involves the presence of dry masonry. The indisputable advantage of the method is, what to do such work with your own hands is the easiest. The main thing, bring a flat base and fix the tile in the sand. But there is a big disadvantage of this method - the water will gradually wash away the base, therefore, the technique is ineffective.
When laying on cement mortar it is possible to exclude damage of material by water. However, in addition to labor intensity, there is another drawback - during the seasonal dynamics of the walls, the foundation and the soil itself, as well as paving slabs, the concrete gradually cracks.
The best option is to use a mixture of sand and cement. It eliminates the disadvantages of both technologies.
Step-by-step instructions are presented ??further.
Site preparation and tiling
Before paving, it is important to prepare the soil. This stage involves several basic actions:
- Removing the soil layer. First of all, measure the distance from the walls of the building, no less 70 centimeters. Optimal width - 100-120 cm. The depth of the groove should be close 25-30 cm.
- Foundation insulation. Apply a special layer of insulation, the embankment from expanded clay and the paving slabs. It is better to use artificial materials, which do not accumulate moisture, example, polyurethane.
- Waterproofing. The foundation of the house and part of the paving is smeared with clay. Additionally, PVC film or geotextile is laid along the walls.
- Gravel-sand pillow. The recess is covered with gravel a few inches and sand about 15 cm. Then the surface of the last layer is leveled with a rake and rules.
preparation of the base
The otmostka is laid out in the direction from a house wall and from itself. Installation of elements is performed as follows, that each fragment of a covering was deepened in sand approximately on 2/3 its height. It is important to keep the same distance between the tiles and check the level on each row.
So that the track does not diverge and looks neat, install curbs. They go to great depths, than other elements. In order to fix them are concreted. Laying paving takes little time. At the same time do not rush, as any skew in the future will affect the quality of the entire surface.
Strengthening of a covering and installation of drains
To make the track strong and solid, after laying make a number of manipulations. First, prepare a cement-sand mixture. Make it easy: mix sand and cement in proportion 3: 1.
Then clean the paving surface from foreign debris and pour the dry mixture on the tile. Using a brush, distribute the mass on the seams. Once they are filled to the brim, remove debris and spray the track with water. It will flow into the joints and seal the mixture.
After compaction and drying of the paving of the house, repeat from start to finish again. Cement swells when wet and becomes sticky. This cement-sand mixture will securely fasten the elements of the coating and prevent leaching of the substrate.
Stages of laying tiles
We will separately consider the technology of installing a drainage system around the building. After precipitation, rainwater flows from the roof of the house and on the walls. To prevent the destruction of the coating and the accumulation of puddles, installation of a special drainage system is performed, which is included in the standard paving device.
The gutter consists of several parts. First of all fix gutters on roof perimeter. They are installed at a slight incline and connected to the pipe, on which precipitation flows down from the roof. Concrete drains are additionally mounted along the inner perimeter of the pavement. The system has access to the transverse gutter. On it water also will flow down in the established place.
When paving equipment, carefully plan drainage from the foundation of the house
To direct the current in the right direction, drain elements are installed at a slight slope. This instruction is also used when installing ordinary tiles.
The calculation is simple: the angle c is taken as a basis 2-3 degrees per meter of track. This slope is invisible and effective.
If done correctly, the foundation of the house will be reliably protected from the negative effects of the external environment. In addition, paving will transform the home and make the surrounding area aesthetic.