Disassembly and assembly of the engine: order and features
Some motorists for various reasons prefer to repair the car with their own hands. In these cases, it is important to know the procedure for disassembling and assembling the engine. To begin with, it is worth realizing, that it will not be possible to do without expenses at all. Even if you do not plan to replace parts, when assembling will have to install new gaskets (except in those cases, when the gaskets are not damaged or punctured).
You may also need an engine sealant, which can be used instead of gaskets, torque wrench (required for assembly), as well as a set of wrenches of different sizes. And, you will need not only horn and socket wrenches, but also end (preferably with replaceable heads, long and short collar). in addition, will take a lot of free time, as disassembly takes from several hours to two or three days, depending on the make and condition of the car. Let's look at the procedure for disassembling and assembling the engine in more detail.
Disassembly and assembly of the power unit
The engine will have to be removed for complete disassembly. You can do this right away, and it is possible after that, how the cylinder head will be removed. You will need a hand winch and a sturdy support to remove it (example, beam) on which it can be hung. Shooting the engine also takes several hours.
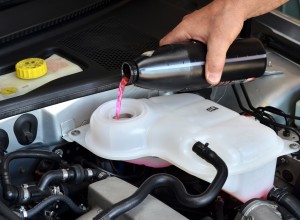
First you need to drain the oil and coolant, and remove all attachments: fuel pump, carburetor, water pump (pump), generator, oil pressure sensors, oil filter, oil dipstick, soap, etc.. It is strongly recommended to fold the nuts and bolts from each bridle separately during further work. Example, in signed boxes.
In what order is the motor disassembled: main stages
Disassembly and assembly of the engine in general is almost always the same. There may be some differences in detail depending on the make and model. The following is the proposed procedure for the removed power unit.
- The transmission is detached. There is nothing particularly complicated about this, as it is fastened by means of bolts. It is most convenient to remove it after dismantling the engine, however, you can separate the node earlier. At the same time at installation of the motor in the place difficulties are possible.
- Clutch disengages. To do this, unscrew the bolts, attaching the clutch housing, then the whole node is removed.
- Now you need to remove the crankshaft drive pulley. This will require a sturdy flat screwdriver and wrenches of the appropriate size (it is better to have a gas key). First you need to fix the crankshaft. To do this, use a screwdriver to stop the flywheel. To do this, it is necessary to screw in a bolt in an aperture of fastening of coupling, insert a screwdriver between the teeth of the flywheel and rest on the bolt.
- Gas key (or carob of the corresponding number) unscrew the nut (on some cars it is a ratchet). Then something appropriate (it can be a balloon key) for functions of the lever the pulley is hooked up and removed from the place. Now unscrew the bolts, fixing the flywheel, after which this detail is removed. There is a plate under it, which is held by bolts. It also needs to be removed.
- The timing belt or chain is removed from the camshaft, if the cylinder head has not been previously removed. In some cars, the valve cover must first be removed to access the timing belt or chain (it is a cylinder head cover). It is fastened with nuts on pins or bolts. There is a gasket under the lid, which can be saved and reused if appropriate.
in addition, many motors also have a front engine cover, which covers the chain or camshaft belt. Of course, there is also a gasket under this cover. But sometimes it is replaced by a special sealant. The cover is usually fastened to the studs with nuts.
To remove the belt (chain) you must first loosen the chain itself, removing the tensioner. Next, the camshaft gear must be dismantled. This part is fixed with a bolt. But in addition to the appropriate size of the key will be needed here (Anyway, on domestic engines) powerful flat screwdriver or chisel, as well as a hammer. With these tools, the locking plate is bent, which does not allow the bolt to unwind spontaneously.
When the gear is removed, the chain is removed and it is possible to start removal of a gear of a cranked shaft. It is better to have a special camera here, since without him, perhaps, will have to tinker. This part is fixed on the shaft with a key, which can sit quite tightly in the groove. If in the process of removing the key its edges were slightly deformed, then you can fix them with a file. The last procedure at this stage is to remove the chain tensioner shoe. There should be no problems with this.
6. Disassembly of a camshaft. To do this, unscrew the nuts (they are on studs), which fix the camshaft housing and remove the shaft itself.
7. Remove the cylinder head. It is fixed or bolted, or stud nuts.
You can now turn the engine over and unscrew its pan. There will be a gasket under the pallet. her, probably, will have to change, but you can do with sealant.
We also recommend reading the article about it, how to tighten the bolts of the cylinder head. In this article you will learn about the procedure for tightening the cylinder head, as well as with what effort (moment) it is necessary to tighten bolts of a head of the block.
8. Remove the oil pump. Unscrew the rear gland cover (from the end of the engine). The shaft of the oil pump and a gear wheel of its drive on a back part of the motor are taken out. For this purpose it is necessary to unscrew bolts and to remove a fixing bracket, then the shaft is removed with a screwdriver, and then the gear. It must be treated carefully, so it plays an important role in engine operation.
9. The next important step is the dismantling of the CSM. Without this process, complete disassembly and assembly of the engine is not possible. This requires attention and accuracy, since the parts are not interchangeable, and individual.
10. Removal of connecting rods. To begin with it is necessary to turn a cranked shaft so, so that the two connecting rods are in the upper position. Then unscrew the nuts from the connecting rod cover and remove the cover itself (yoke). The yoke will sit tight, therefore, careful tapping of the hammer on the sides will be required. You can now remove the connecting rod. It is pushed out together with the piston by hand or the hammer handle.
Warning! Each connecting rod and each tow is numbered. Numbers must match, therefore, after removing the connecting rod, it is better to install the cover in place.
Inside the connecting rods and covers have metal inserts. If their replacement is not provided, then it is necessary to scrape the corresponding number on the non-working side. The same procedure is performed with the other two connecting rods.
11. Removing the root caps. They are also fixed with nuts, are strictly in place. On their inner side there are also inserts - root inserts.
12. The crankshaft is taken out, old inserts from under it and locking half-rings are removed.
The process of disassembling the engine can be considered complete.
Car engine assembly: what to consider
Assembly of the engine is carried out in reverse order. When installing the connecting rods should be considered, that each of them has factory marks on the case, which must match such marks on the cylinder block housing.
Conditionally speaking, you need to follow the left and right sides when installing. in addition, as mentioned above, the connecting rod and the connecting rod cover are individually matched to each other at the factory. To be precise, details are made of one integral preparation. They cannot be replaced.
Mandrel is required to install the pistons in the sleeve, which will press the piston rings. It is very easy to make it yourself. You will only need a suitable piece of sheet metal, which can be wrapped around the piston head, so that there is room at the ends for bending outwards (for him the mandrel is withheld). The mandrel rotates around the piston head and is inserted into the sleeve, then the piston is lowered with the connecting rod down. Directed to viymaєat.We also recommend reading the article about it, how to unscrew a broken bolt from the engine block. In this article, you will learn about the available ways to unscrew broken bolts and studs, and what nuances should be considered in such a procedure.
Connecting rod and root liners are installed as follows, to match the locks on them and the seats. They must be lubricated with machine oil before installation, wipe with a clean cloth, so that there are no dust. Root and connecting rod covers are tightened with a torque wrench. Tightening forces for different cars are different. It is written in the passport, as well as in special reference books.
The nuts on the cylinder head are tightened in a checkerboard pattern, since the Middle Ages. They should be tightened gradually, again, following the order. All adjacent surfaces must be thoroughly cleaned before assembly, between which gaskets are installed. If necessary (the presence of bullies, zadirok) they need to be ground. You can even do this with a file.
Finally, note, that if disassembly and assembly of the engine is carried out independently, it is better to have special reference books on a particular car model.


