What shall I do, if a Canon printer, Epson, HP, Brother Does not print after refilling the cartridge
Because the price of a new cartridge remains high and almost equal to the cost of the printer itself, many users, to save money, resort to self-refilling ink tanks. But, despite, that the cartridge is full, in some cases, the printer refuses to print.
The main causes of the problem
Before, how to troubleshoot a cartridge, you need to check the USB cord. Oddly enough, sometimes this cable is the cause of the problem. If you do not have a spare cord, try moving all the connectors or connecting the cable to another USB port on your PC. If these actions did not improve the situation, means, you need to look for other reasons, why the printer does not print.
The ink in the nozzles dried up
Inkjet printers have one major drawback: after a short period of time, the ink in the nozzles of the print head dries. That this did not happen, you need to print something all the time, or 1 every few days (from 3 to 7) turn on the printer, that he "blew" the nozzle.
Air got at refueling
Air in the cartridge, refilled with ink, will not cause much harm. Unless the paint starts to flow out of it, as there will be no necessary vacuum inside the tank, which keeps the ink from leaking.
Another thing, when the ink runs out, and air enters the nozzles of the print head. In this case, it is possible to dry the paint in the capillaries of the head. Air can also get in and dry the head, if it is parked incorrectly after the printer has finished. It is important to check, so that the carriage always reaches the parking space. Only in this case the nozzles will be protected from drying out.
Air can also damage the print head, especially in Epson printers, because it is fixed. The problem is, that when changing inkwells, if you do it slowly, or when installing a CISS, when the head is outside the parking lot, nozzles have time to dry.
The ink is selected incorrectly
Some users think, that the ink is the same for all printer models. But really, even for devices of the same brand, the ink may differ. Perhaps, Do not print the cartridge due to incompatible ink refills, which entails complete flushing of the print head.
It is very important when choosing a paint to read the instructions for it, where the devices are listed, for which it can be used.
You should also pay attention to the expiration date of the ink.
The cartridge is installed incorrectly
Sometimes a situation arises, when the printer does not see the cartridge. This is due to the fact, that there are electrical contacts on it, which at installation should coincide perfectly with contacts, located inside the carriage. If for any reason there is a violation of contact (drank, the paint has dried), then the device does not work properly. It is also necessary to peel off the protective film from the contacts, if the inkwell is new.
Some devices, especially MFPs, will not start working, while the lid is open. The reason for equipment failure lies in a special cover sensor. So, if you have installed CISS, and the loop from it prevents the lid from closing tightly, then this sensor must be locked, example, a piece of foam (locking methods may differ for different printer models).
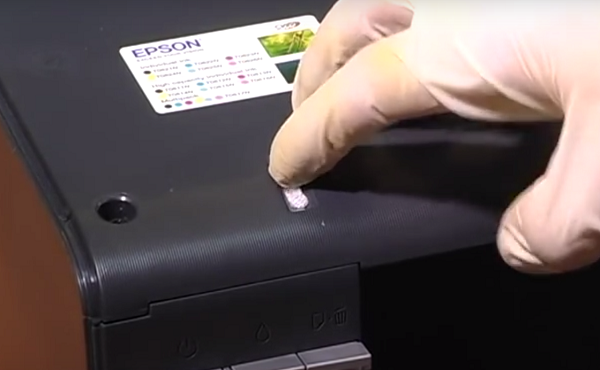
Problems with the diaper chip or counter
Inkjet printers use two types of cartridges: disposable and refillable. In disposable manufacturers install a special chip, which blocks the operation of the device after the ink in the tank. Even if you pour paint into the tank, the chip will still signal, that the container is empty. The printer also refuses to print, if the diaper counter indicates, that it is crowded.
Diapers are a place in the device, filled with foam, where the excess ink from the print head merges.
Troubleshoot printer problems (IFIs) Brother
To troubleshoot a dry print head, diapers, chip, etc.. there is no universal method, because the design of the devices is different. Different printer models have their own ways of troubleshooting. Brother MFPs often refuse to print after refilling the cartridge due to dry nozzles or diaper overflow.
Restore the printhead
Brother ink cartridges use water-ink cartridges, and with pigment. Usually pigment ink has a "black" cartridge - they are to blame for clogging the print head, if the device has not been used 3-4 weeks.
МФУ Brother, unlike other models from different manufacturers, have such a design, that the inkwells are located on the side and are connected to the print head by means of silicone tubes (loops), like the loops in the CISS.
Paint, as usual, does not dry in a loop or cartridge, and in the nozzles of the print head (PG). So first you need to get to the head. In standby mode, this node is in the parking lot in a locked state. If you open the lid, then the node is visible, but it is impossible to move it.
To move the head off the lock, do the following:
- turn on the device and wait for its full self-tuning;
- run the nozzle test with the scanner unit closed;
- as soon as you hear the movement of the printing mechanism, unplug the power cord, to stop the carriage from moving.
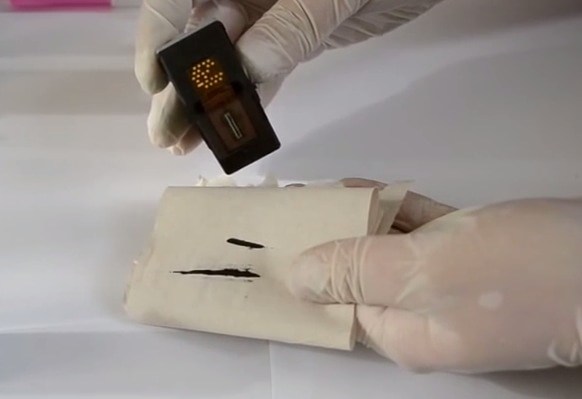
You can now manually move the carriage in any direction. It is necessary to restore the nozzles, so that the washing liquid gets on them in some way. The simplest method is to use a parking space for this purpose:
- you need to take a napkin and fold it in 3-4 times;
- place a napkin on the entire surface of the cap;
- heat the flushing fluid to 40 degrees and soak a napkin well with it, located on the cop;
- applying maximum care, move the carriage with the print head to the parking space, so, so that the napkin does not move, and the nozzles were in close contact with the flush;
- leave the carriage in this position for a while 5 to 10 hours (it is better to do the procedure in the evening and leave the "soaking" until the morning);
- if "soaking" did not give the expected result, then it can be repeated, replacing the napkin with a new one.
This method is quite effective, if the case is not running. Otherwise, you will need to contact the service center.
Removing the diaper
Brother printers do not have sensors, monitoring the overflow of the diaper with used ink, and therefore the control of the adsorber is carried out at the software level. The calculation is based on the number of prints, which left the device, as well as the number of head cleanings (forced and regular). After some time of operation of the unit the software counter determines, that diapers are time to be overflowing, and locks the printer, the message "Cleaning" or "Error 46" is displayed on the device.. To reset the counter, no additional software required. The device has a reset function via the service menu. To get into it, do the following.
- Unplug the machine from the wall outlet.
- Pressing and holding the "MENU" key, connect the power cord to the mains.
- Wait for the message "Maintenance" to appear on the screen, which is displayed for a couple of seconds. At this point you need to have time to remove your finger from the "MENU" key. If it didn't work out, then turn off the outlet and do it all over again.
- Clicking on "+", wait, until the number appears 8, then click "OK".
- Using the "+" key, select a number 2, and after "OK". After these steps you should see the message "MACHINE ERROR" or "MACHINE ERROR 00". If no such message appears, and any other appears, then reset the diaper counter will not work.
Next, you need to go to the procedure of software reset:
- follow the steps, mentioned above, to the point 3 (including);
- then use the "+" button to select a number 0 and then press the "OK" key, the image “00:00 XX: XX», of XX: XX is the time;
- now you need to press the "BLACK AND WHITE" key (her, as well as the "COLOR" key, can be found near the "START" button) before the inscription "PURGE: xxxxxх » (instead of xxxxxx there can be any numbers).
At the next stage for the inscription "PURGE" it is necessary to enter a special code "2783":
- use the "+" key to find the number on the display 2 and click "OK";
- further, «+»> «7»> "OK";
- «+»> «8»> "OK";
- «+»> «3»> "OK".
- you should then see the message “PURGE: 00000»;
- pressing the "BLACK AND WHITE" key, select “FLUSH: xxxxxх »;
- repeat all steps, which were made after selecting the inscription "PURGE";
- after selecting a number 3 and clicking "OK", you will see the message «FLUSH: 00000», then turn off the printer, from the electrical outlet and switch on again.
After resetting the counter, the printer will resume operation. It is also recommended to remove the diaper itself, rinse it and dry, but this will require disassembly of the device. To understand, How to do it, a separate article is required.