What is an LED strip: how to install it, its design, functions and principle of operation, features and methods of installation
LED strip is a very convenient light source. Compared to classic incandescent lamps, it has many advantages. Minimum heat dissipation, possibility to lay a route of any configuration, convenient organization of e-government and most importantly - efficiency. Therefore, this topic is how to install the LED strip correctly, many Internet users are interested, to decorate your own home or raise the level of comfort in it.
How it works?
The LED strip is a flexible substrate, on which the system of current-carrying platforms is put. Between them at equal distances are semiconductor light sources - LEDs. Today the market presents products from different manufacturers, however, they are all characterized by such features:
- the strip is quite narrow and flexible, to be placed with any level of curvature;
- the back side of the LED strip is covered with an adhesive composition, to conveniently attach to smooth surfaces;
- tape power supply standardized - 12 or 24 DC volts, which must be indicated along the entire length of the product.
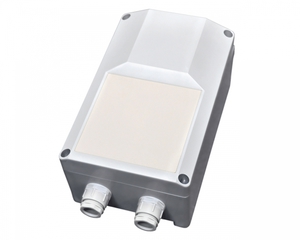
Manufacturers care about user convenience, offering all the necessary accessories in the form of controllers, voltage converters, connecting clips for the formation of long or intermittent trajectories, behind which the tape is laid.
How to install?
If described in general terms, installing an LED strip is quite simple. The process can be described in literally a few points.
- A trajectory is being developed, on which it is necessary to establish a strip, and the location is assessed, where the voltage converter or controller will be located.
- Tape resign to estimate location.
- If you need to increase the LED strip or, vice versa, pause to create a sharp turn, sections of the tape are connected with special clips.
- The final laying of the tape is carried out. To do this, the protective coating is gradually removed from the back and the strip is applied with a sticky side to the surface, on which it is mounted.
- The connection to the controller or voltage converter is made.
In short, this is how man will act, when you have to install LED lighting. There are some subtleties, which must be taken into account, to achieve optimal results, example:
- LED strips are either monochromatic, or multicolored. A controller is required to connect the latter, powered by LEDs of each color. Monochromatic cost only a voltage converter;
- voltage control in the form of switches or circuit breakers can be located anywhere, and the power supply of the tape itself is best mounted directly at the beginning or end of its trajectory;
- two-contact clips are used to connect one-color ribbons, for multicolors - four-contact;
- it is possible to mount a tape and classical methods - by means of the soldering iron, tin and welding. This is available even to beginners. You have to remember, that the conductors are quite thin and as a result of overheating may lag behind the substrate, therefore orthophosphoric acid shows the best results as a solder.
There are several common techniques for laying LED strip, which may show different results, optimal for certain tasks.
Laying of a tape with gluing on a surface
This way to install the LED strip is as simple as possible. There is one limitation - twists or fractures should be avoided, so as not to damage the conductive platform. However, in most cases, they simply do not occur. It is worth noting, that the LED strip is immediately intended for this type of installation, therefore, it is suitable in many cases.
Installation on furniture
Lower cabinet lighting, niche design, organizing contours of functional zones for interesting aesthetic effects is just a short list of goals, which are achieved when installing LED lighting on furniture. Invaluable work of such lighting in the kitchen, also excellent results are shown at registration of internal parts of big sliding wardrobes.
The work is as simple as possible. It is better to install the LED strip on long routes. For a neat appearance, voltage converters and controllers are located inside cabinets or other interior items.. Modern electronic control systems can provide motion recognition, zonal automatic switching, even remote control.
Converters and controllers should provide acceptable conditions for heat dissipation. That the LED tape kept strong and worked long, the surface should be thoroughly cleaned and degreased, on which it will be applied. This will provide the necessary strong adhesion.
Installation in ceiling and wall niches
Plasterboard popular today allows you to really create unique artistic solutions in the form of multi-level ceilings or interesting niches in the walls. They will become even more attractive, if you decorate them with LED tape. It will not only improve aesthetics, but also work as an effective background multipoint lighting.
If you decide to install LED tape on drywall, you need to follow some simple requirements:
- surface, where the strip will be located, carefully plastered and leveled, also, one pass is made by a first coat;
- to place voltage converters and controllers it is necessary so, so that they are easily accessible for repair, conditions for heat dissipation should also be provided;
- to create interesting effects and achieve that, so that the LEDs do not "hit" directly in the eye, sides are used, which scatter or redirect the light flux;
- framework of gypsum cardboard surfaces - current-carrying, there is also a risk of damaging the tape with mounting screws. Therefore, the LED strip is laid after the work is completed, with careful control of the absence of short circuits.
Undoubted advantage of plasterboard constructions - it is possible to deduce power supply and to place voltage converters for an LED tape in any place. As a result, it is easy to build continuous routes of great length, without connecting pieces of the strip or interrupting its trajectory.
Installation around the perimeter of the room
Location of LED strips on polyurethane ceiling baseboards or at the bottom of the room - very popular. In this case, the location of converters and controllers is not difficult, and when installed under the ceiling, the tape has almost no chance of being damaged.
Surface of polyurethane ceiling elements, as well as plastic baseboards on the floor is quite smooth and durable. Therefore, it is enough to degrease, to properly glue the LED strip.
Installation close to the floor has one drawback - the LED strip can be easily damaged. Despite, this way of marking areas in the apartment or house, as well as creating a ribbon backlight, quite popular.
Laying of LED tape inside special boxes
The rather low strength of the LED strip has always been the biggest problem, which often limited its use. So today there are a number of profiles, the most popular of which is aluminum with an external light filter. Such designs allow to solve a number of problems at once:
- the tape is guaranteed to be protected from mechanical impacts in the form of shocks, inflections, stretching;
- the profile is rigid and strong, if a light filter is used, dust protection is additionally provided, and to some extent - the LED strip is protected from moisture;
- laying a strip inside the profile is as comfortable as possible;
- the LED strip is not affected by various temperature changes or humidity fluctuations, therefore it does not peel off and does not peel off.
Work with the profile takes place in two stages. Initially, the route of its placement is planned and laid. Elements of a design are fixed. Then, the LED tape is pasted inside very simply and comfortably.
Rigid profiles show excellent results when installing the backlight close to the floor, providing maximum protection against mechanical impacts. Very good results are achieved when installed on furniture - if desired, the profile can be milled and located flush with the surface.
Flexible profiles show their advantages when placing LED tape on ceiling or wall niches of complex shape. However, today this market segment is gradually dying - the industry offers a ready-made solution in the form of LED strips, enclosed in a protective shell.
conclusion
As can be seen from the above, installing an LED strip is quite simple. You just have to be more discriminating with the help you render toward other people, correctly calculate everything and take into account several key requirements, most of which concern the placement of additional equipment. As a result, spending a little time, you can get an economical and efficient light source, that creates beauty or works for its intended purpose.


