LED lamps with their own hands: features of constructions, ways to create your own LED lamp
Making an LED lamp on 220 An interesting lesson in their own hands, which requires patience. Additionally, a little knowledge of physics is required, and the ability to solder. The main task is to create a circuit converter of AC to DC 12 V, on which the LED lamp works.
LED lamp
There is a small glowing diode element, operating on direct current mainly in 12V. To create lamps, collect them several, depending on the required light intensity. The benefits of such lighting:
- meager electricity consumption;
- service life 100 000 hours;
- can work around the clock, without shutdown;
- There is a large selection of different models on sale.
The main disadvantage is the high cost of ready-made LED lamps. The sellers do not understand the question well and cannot answer your questions in a qualified way. The characteristics of the lamp do not take into account the loss of light through the glass, frosted glass and reflector properties.
Estimated data are indicated on the luminaire packaging, based on the characteristics and number of LED elements. Therefore, in fact, the luminous flux of the purchased lamp is much lower than necessary and the lighting is weak. The lamps themselves and the details to create the schemes cost a penny. Therefore, it is easiest for craftsmen to do everything with their own hands.
Use of LED lamps
In houses and apartments it is often necessary to constantly light a place. These can be stairs and children's rooms, Toilets, where there are no windows, and a child lives in the house, which cannot reach the switch.
Dim light and low energy consumption allow you to put lighting in the porches and on the porch, in front of the gate and the garage door. Lamps with a soft glow due to glare, used to illuminate desks in offices and kitchens.
Creating an LED lamp with your own hands
Many are tormented by questions, how to make an LED lamp with your own hands and whether it is possible. Schemes for creating LED lighting, operating from the AC mains 220 v, many, they all solve a number of common problems:
-
convert alternating current to pulsating;
- align it to a constant;
- make the current equal to 12V.
When creating LED lighting with your own hands you have to solve problems:
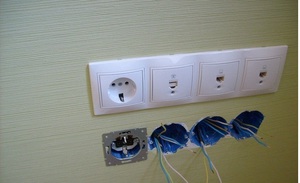
- where to place circuits and LEDs;
- how to insulate a lighting structure;
- proper heat transfer.
Schemes of LED lamps
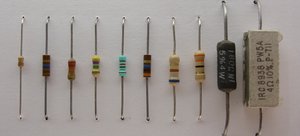
Equalization of variable sweat and creation of necessary power and resistance for LED lamps is solved in two ways. Schemes can be divided into:
- with diode bridge;
- resistive, with an even number of LED elements.
Each option has simple schemes and its advantages.
Diagram of a converter with a diode bridge
Diode bridge consists of 4 diodes, directed in different directions. Its task is to convert sinusoidal alternating current into pulsating. Each half-wave passes through two elements, and the minus changes its polarity.
In the scheme, for LED lamp, in front of the bridge from the side of the AC source on the plus connector capacitor C10,47x250 v. In front of the negative terminal is put on the resistance 100 Ohm. Behind the bridge, parallel to it, another capacitor is installed - C25x400 v, which smooths the voltage drop. It is easy to make such a scheme with your own hands, it is enough to have the skills to work with a soldering iron.
LED element
The board with LED elements is standard, from a failed lamp. Must be checked before assembly, that all details were working. To do this, use the battery on 12 V, possible from the car. Non-working items can be replaced, unsoldered contacts and putting new ones. Carefully follow the location of the anode and cathode legs. They are connected in series.
When replacing 2 – 3 details, you just solder them according to the regulations, which was occupied by failed elements.
Assembling a new LED lamp with your own hands, you need to remember a simple rule. The lamps are connected by 10 successively, then these circuits are connected in parallel. In practice, it looks like this:
- 10 put the LEDs in a row and solder the legs of the anode with one cathode and the other. It turns out 9 joints and one free tail at the edges.
- Solder all the chains to the wires. Up to one cathode end, to another anode.
Texts often use the verbal notation of contacts on the icons diagrams. Reminders for novice electricians:
- cathode, positive - "+", joins the minus;
- Negative anode - "-", joins the plus.
When drawing up diagrams with your own hands, watch out, so that the soldered ends do not touch the others. This will cause a short circuit and burn out the entire circuit, which you managed to do.
Schemes for a softer glow
So that the LED lamp does not irritate the eyes with flashing, a few details need to be added to the assembly diagram. In general, the current converter consists of:
- diode bridge;
- capacitors on 400 nF and 10 uF;
- resistors of 100 and 230 Ohm.
To protect against surges, the resistor is put first 100 Ohm, and for them the capacitor is soldered to 400 nF. In the previous version, they are installed at different ends of the entrance. Another resistor is installed behind the capacitor after the diode bridge 230 Ohm. It is followed by a series of LED circuits (+).
Circuits on resistors
The simplest circuit for those who want to do everything with their own hands consists of two resistors 12 k and two chains with the same number of LED elements are soldered connected in series lamps with different orientations. From R 1 one strip is soldered by the cathode, friend - anode. Another layer to R 2 vice versa.
This creates a softer glow of the lamps, as the LED elements light up alternately and the pulsation of the flashes is almost invisible to the eye. Such lamps can be used even as local lighting when working at a table, replacing, so, ordinary table lamp.
Specialists, who made with their own hands more than one lamp, recommend collecting at least 20 LEDs for this circuit. More often used 40. This provides good lighting and the circuit is assembled easily. For more it is difficult to produce high-quality soldering scheme, without touching neighboring contacts. And it is difficult to collect it in the case.
You can make a lamp out of 4 or 6 more powerful LEDs. Use a special calculator to calculate the schemes, which can be found online.
When creating different schemes with your own hands from LED devices and others, can be used to correctly calculate the online calculator. It is easy to find on websites, which are devoted to electrical appliances and descriptions, how to make them. Its use will greatly simplify the process of calculating the current, resistance and will check the correctness of the selection of parts.
Housings for LED lamps
For a convenient LED lamp, which they made with their own hands, conventional lighting fixtures, use:
- sockets of ordinary incandescent lamps;
- housing from energy-saving lamps;
- halogen lamps;
- homemade devices.
Every specialist, making an LED lamp with his own hands, chooses the most suitable option. The base allows you to screw the lamp into a conventional socket and at the same time provides heat transfer. Overheating, LED lamp fails faster.
Socket with incandescent lamp
Carefully separate the glass flask and remove the spiral. Then the scheme is placed inside the base and lamps are mounted on top of the board. The disadvantage of this base is unattractive and poor insulation.
Energy saving lamp housing
The most convenient and practical option for creating an LED lamp with your own hands. Methods of mounting diodes can be different. At first the burnt-out lamp is carefully disassembled. Then the converter board is deducted from it. Further, there are options.
Can be placed in the holes of the lid, which are made under glass flasks. This is a version of the lamp with three arched light elements. The scheme is located inside the base, provides heat transfer. LEDs are inserted into ready-made holes and mounted in them.
The finished board with LEDs can be placed in the base with a simple plastic lid from a water bottle. You can use a self-made circle and drill holes in it for diodes. As a result, it is convenient to use the aesthetic appearance.
Some craftsmen, making with their own hands, use a halogen lamp housing. The inconvenience of this option in the absence of the usual for the base the ability to screw the lamp into the socket. This option is more suitable for creating your own indicators and DC lamps.